First timer: keeping meat birds, March-May 2015
|
Febrary 16, 2015
Today I ordered 25 meat birds from Welp Hatchery. I looked at a lot of different options and they had the best prices of all the well reviewed hatcheries. John and I have talked about raising our own meat birds for years now and I honestly don't think there is ever going to be a "good" time. We are busy parents but this is a high priority for us so we are going to make it happen. Two other families want birds too, and we are going to split this order. Maybe if it works out well, we can do a larger order in the future and have enough chicken to sell; but this batch is just for our freezer. |
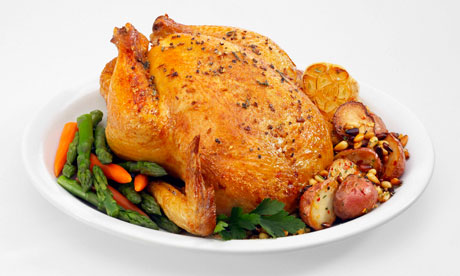
This is what I'm hoping to have in about 10 weeks.
|
The main reason I would like to raise meat birds is to make sure we are not encouraging our industrial food system to mistreat animals and to protect our whole country from the effects of over-farming. Factory farms pollute our limited fresh water supply, strip soil of essential nutrients, and abuse animals for the sake of cheap, overly abundant food.
The Centers for Disease Control acknowledges the role of factory farms in creating and spreading antibiotic resistant bacteria. The CDC developed educational material to help farmers reduce the occurrences of illness and death to humans. However, the reality of large scale farming is that animals kept in unnatural living conditions are going to need lots of medications poured in to them so that they can stay alive, make it to the market, and help the farmers pay their bills.
The only choice that makes sense to me is small scale farming, where farmers spend more time providing the animals with natural living conditions so that the animals stay healthy. Some people may feel this is a luxury-- food produced on small farms can cost a lot more money and not everyone can afford it. This is less a financial problem than a matter of expectations. Americans, rich and poor, are raised in a culture of abundance. If you look at the shopping cart of a wealthy mom at an up-scale grocery store or a working-poor mom paying with food stamps at a discount store, you will find many of the same types of food-- prepackaged snacks and meals meant to stock our cabinets and entertain our taste buds but not necessarily nourish our bodies. We need to reduce the amount of food we expect to keep in our pantries and refrigerators and make sure the food that is there is grown in a way that sustains our planet and our keeps our bodies healthy.
March 20, 2015
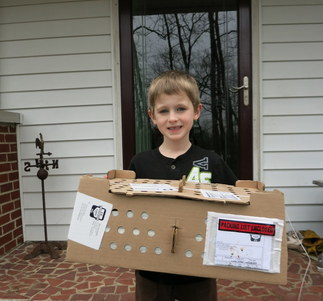
They're here! They're here! I ordered twenty-five meat birds from Welp Hatchery last month and due to high demand, they weren't available for shipment until this week. I was totally surprised when my post office called to say they ready to be picked up. The mail clerk was sad to hand them over. She said they were great company this morning.
We purchased ten Red Rangers and fifteen Cornish Crosses. After shipping and vaccinations, we paid $2.28 per bird. These are straight run, so some will be larger males and others will be smaller females at processing time.
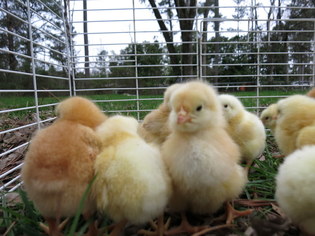
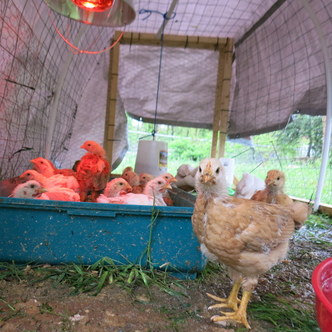
Before we opened the package, I explained to the boys that some of the chicks might have gotten sick or injured and we might find dead or hurt birds. We lifted the lid an and 27 fluffy chicks greeted us with a deafening chorus of peeps. One of the Cornish Crosses looks like it is sick or got crushed in shipment. It is breathing and will occasionally perk up but mostly it just sleeps in it own little box near the heat lamp.
The boys enjoyed working together to get the chicks settled into the brooder and helped them eat their first meal. While they cuddled the tiny birds, I reminded them of how quickly chicks grow up and that when these get to be full grown we are going to eat them just like the nuggets at Chick-fil-a. They said, "Awwww," and then went back to playing with the babies. We are taking this one day at a time.
March 21, 2015
We have had them for just one day and already see signs that these chicks are growing quickly. Half of them developed wing feathers over night. They took a field trip to the backyard today while I cleaned their cage. They happily nipped at the grass and scratched at the dirt.
I am trying to learn about raising meat birds by talking to people who have done it for years. The lady at the hatchery told me that if the chicks have been vaccinated for coccidiosis like mine have, they should not be fed medicated feed.
However, managers at two local farm stores told me they always do medicated chick starter because if you don't, the chicks will die. In fact, I could not find un-medicated feed within 20 miles of my house. I had 25 hungry babies in my van so I bought the medicated feed and went home. In reality, the medication in the feed cancels the benefit of the vaccination so the chicks are now at risk for coccidiosis. None of the other animals on our land have the parasite, so hopefully this round of birds won't have a problem. Next time I will have a good supply of unmedicated food before the birds arrive and also have the birds vaccinated by the hatchery.
There is not a wide variety of chick feed available in my area. Two people mentioned finding a good quality, un-medicated feed about 80 miles south of here but it seems unreasonable to drive that far. The most important quality for meet birds is the protein content. Try to find a chick starter with the highest protein possible, probably around 20% for the first few weeks. Tractor Supply has a few options but they don't keep them in stock consistently. I need to remember to stock up instead of buying one bag at a time.
The sick chick that we kept aside died last night. All 26 (yes, we got two bonus birds!) are happy and adorable. I need to clean their small cage daily and replace their food and water throughout the day. Next time we order chicks, I plan to have a larger brooder ready for them.
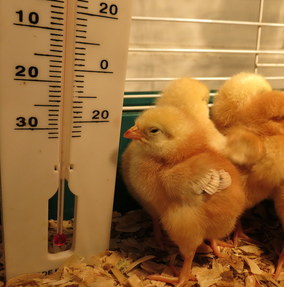
I bought a new warmer bulb to replace the 150 watt clear bulb. The weather has been chilly and the birds were pressing themselves close together under the bulb, showing me they weren't getting enough heat. I chose 250 watt bulb with a red tinted to make sure we don't have an "accident" where a bird gets a small injury that produces a speck of blood and the other chicks will supposedly peck it to death. That could be urban legend but so many people have warned me about it, I am not going to test the theory myself.
Cost to date:
Vaccinated Straight Run Birds: 26 @ $2.19 = $57
Chick Starter: 50 lb. = $14
Red Light bulb = $12
------------------------------------
TOTAL Cost Per Bird= $3.19 on Day 2
The sick chick that we kept aside died last night. All 26 (yes, we got two bonus birds!) are happy and adorable. I need to clean their small cage daily and replace their food and water throughout the day. Next time we order chicks, I plan to have a larger brooder ready for them.
I bought a new warmer bulb to replace the 150 watt clear bulb. The weather has been chilly and the birds were pressing themselves close together under the bulb, showing me they weren't getting enough heat. I chose 250 watt bulb with a red tinted to make sure we don't have an "accident" where a bird gets a small injury that produces a speck of blood and the other chicks will supposedly peck it to death. That could be urban legend but so many people have warned me about it, I am not going to test the theory myself.
Cost to date:
Vaccinated Straight Run Birds: 26 @ $2.19 = $57
Chick Starter: 50 lb. = $14
Red Light bulb = $12
------------------------------------
TOTAL Cost Per Bird= $3.19 on Day 2
March 23, 2015
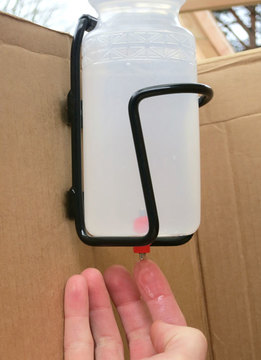
Yeah, I know they aren't mammals but you can definitely find chicken nipples if you look... at the store! A chicken nipple is a special waterer that helps baby chicks drink without dropping food and dirty litter into the water supply.You can buy a fancy "Poultry Watering System," or drill a small hole in a soda or sports bottle. Insert a $2 chicken nipple and, voila! Clean water for your chickies.
I swiped this picture of a DIY waterer from Coop Thoughts. Some nipples are threaded but these are "push in". Makes them a little more expensive, but still cheaper than a flimsy store-bought water dish.
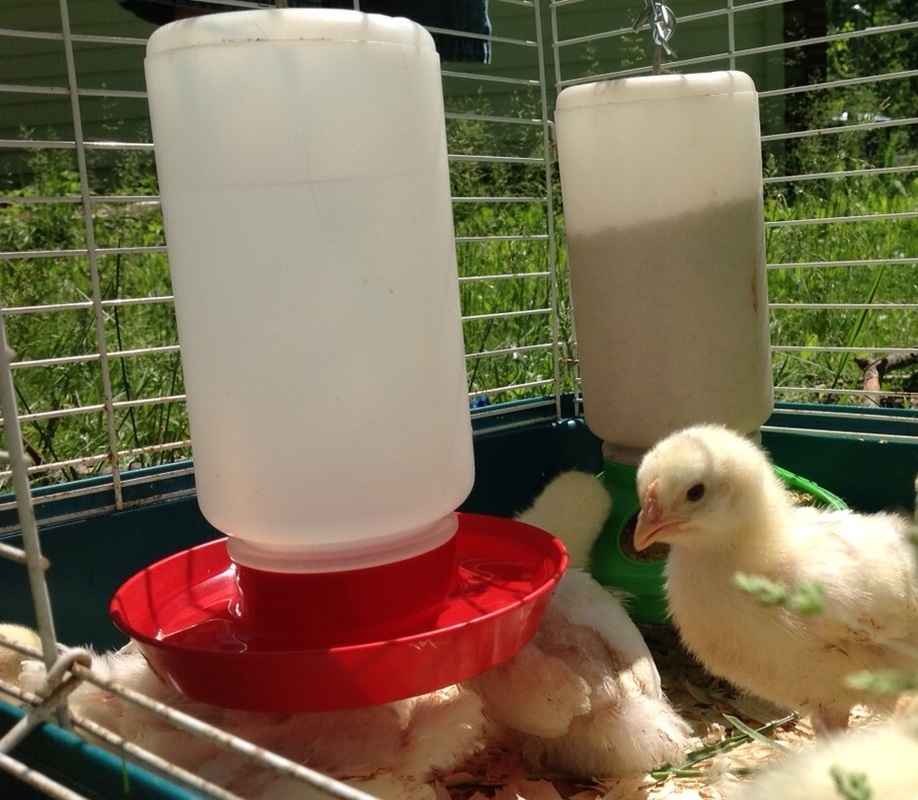
I have been too busy to pull out the drill so I am using the plastic water dishes available at all farm supply stories. The down side of these types of containers is that they are light weight and allow the chicks to knock the dish over and spill the water. I must change the chicks' water at least three times a day. Since we have two batches of chicks (layers and meaties) I spend a lot of time checking food and water.
Life got easier when I found a hook and a bit of chain in the garage this morning. I poked the hook in to the top of the water and food dishes and hung them from the chain. It has been six hours, and their dishes are still full. Hallelujah!
We lost another Cornish Cross chick yesterday. It just wasn't growing. It was so tiny and cute but it could barely walk and eventually just laid on the floor of the coop being trampled by his brothers and sisters. My husband very sweetly took care of it for me.
My original cost per bird was figured at 27 for $57, now we are down to 25 (which is what we ordered). I need to recalculate based on losing two chicks.
Yeah, I know they aren't mammals but you can definitely find chicken nipples if you look... at the store! A chicken nipple is a special waterer that helps baby chicks drink without dropping food and dirty litter into the water supply.You can buy a fancy "Poultry Watering System," or drill a small hole in a soda or sports bottle. Insert a $2 chicken nipple and, voila! Clean water for your chickies.
I swiped this picture of a DIY waterer from Coop Thoughts. Some nipples are threaded but these are "push in". Makes them a little more expensive, but still cheaper than a flimsy store-bought water dish.
I have been too busy to pull out the drill so I am using the plastic water dishes available at all farm supply stories. The down side of these types of containers is that they are light weight and allow the chicks to knock the dish over and spill the water. I must change the chicks' water at least three times a day. Since we have two batches of chicks (layers and meaties) I spend a lot of time checking food and water.
Life got easier when I found a hook and a bit of chain in the garage this morning. I poked the hook in to the top of the water and food dishes and hung them from the chain. It has been six hours, and their dishes are still full. Hallelujah!
We lost another Cornish Cross chick yesterday. It just wasn't growing. It was so tiny and cute but it could barely walk and eventually just laid on the floor of the coop being trampled by his brothers and sisters. My husband very sweetly took care of it for me.
My original cost per bird was figured at 27 for $57, now we are down to 25 (which is what we ordered). I need to recalculate based on losing two chicks.
|
Cost to date:
Vaccinated Straight Run Meat Birds: 25 @ $2.28 = $57 Chick Starter: 50 lb. = $14 Red Light bulb = $12 ------------------------------------ TOTAL Cost Per Bird= $3.32 on Day 7 In this picture, you can see the hook at and chain at the top of the feeder. The chain allows me to raise the dish as the chicks grow, so they won't be able to throw food out as easily. The swinging motion of the feeder also keeps them from getting a good grip on the food to toss it on the floor. |
|
March 26, 2015: One Week Old
Not all chicken feed is created equal. It is really challenging to find a quality source of feed. I went to a couple of farm stores and took pictures of the ingredients list of each type of chick starter. Then I went home and did my research.
1) The most common chick starter included Amprolium, which is not an antibiotic. It inhibits the active transport of thiamine (B1) by doing so it starves the coccidia. Amprolium is used in the prevention and treatment of coccidiosis. It sounds like this is permitted for certified organic chicken.
2) When my chicks arrived I went to a different farm store and purchased a similar looking feed. Unfortunately, it had a different active ingredient called Bacitracin. This is an antibiotic which aids in the prevention and control of necrotic enteritis caused by Clostridium perfringens. You can read more about it here.
3) Later, the Tractor Supply started carrying the Purina brand unmedicated chick starter so I was able to switch at day 10. That is a horrible thing to do from an immunological perspective, but I don't expect we have a problem with coccidiosis in our backyard so we should be fine. I wanted to support a local business by buying from a local mill and farm store but they follow a very 20th century "throw chemicals at it" philosophy.
Note: Tractor Supply hasn't been really consistent. They mislabel chicks all the time (I still don't know what kind of laying hens these are!) and they don't keep your favorite feed in stock all of the time. If you find something you like to feed to your birds, buy extra so you can make it through when TS forgets to order it for a month of so.
March 30, 2015
I had to kill my first chicken today. It was in fact the first warm blooded creature I have ever killed. The little Cornish X was trampled by the other chicks while they were eating. The fluffy yellow Crosses are far weaker than the Red Rangers and are more easily injured. I am in the process of separating them out and next time we keep meat birds, I won't keep them together at all. Down to 24 chicks. It was a mercy killing, so I didn't feel bad about it, but it was surprisingly difficult to deal with the reality of slaughtering chickens.
April 1, 2015
When starting out with chicks, it is tempting to try to save money by buying the cheapest materials possible or re-purposing something from around the house. Let me tell you, the time and effort spent in fixing the problems that these inefficient tools cause is just as costly as money you would spend buying the right tool at the store. Here are some examples.
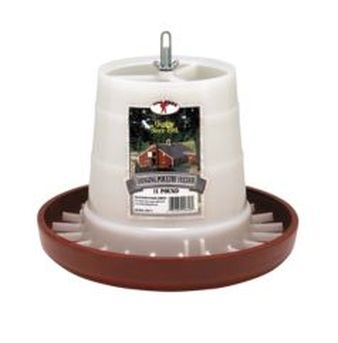
Hanging feeder
Chickens (big and small) love to play with their food. Part of it must be boredom. After all, they are "cooped up" all day! You might be tempted to use a dish from around the house or purchase a cheap feeder that sits on the coop floor. Either way, these kinds of feeders spill 1/3 to 1/2 of the food and spoil it in the dirty litter. This was true both of my small flock of layers and the large flock of meaties.
Instead, you should have a hanging feeder that requires the chicks to stand up and stretch their necks just a little to reach the food. The swinging feeder makes it harder for them to fling food out or toss dirty litter in. My father-in-law very patiently told me how to make such a feeder and showed me how successful it is in his own chicken coop. I purchased this feeder for $15 (after coupon) and will hang it this weekend. It has dividers that prevent food from being dragged out.
Heat lamp: The heat lamps come with a clamp but you aren't really supposed to use it. Instead, hang the lamp from an adjustable chain or rope so that it can be easily raised and lowered each day to keep the brooder at the right temperature. Because we had a lamp clamped to the top, we could never get the heat source close enough to the chicks and the temp in the brooder was around 85°F during the last week of winter.
The brooder temperature should stay at approximately 95°F the first week, then reduce the temperature by raising the bulb farther from the chicks by about 5°F each week until the brooder temperature is the same as the temperature outdoors. Depending on the time of year, it can take as little as three weeks to acclimate your chicks to living in outdoor temperatures. There are several good temperature charts on the web.
When starting out with chicks, it is tempting to try to save money by buying the cheapest materials possible or re-purposing something from around the house. Let me tell you, the time and effort spent in fixing the problems that these inefficient tools cause is just as costly as money you would spend buying the right tool at the store. Here are some examples.
Hanging feeder
Chickens (big and small) love to play with their food. Part of it must be boredom. After all, they are "cooped up" all day! You might be tempted to use a dish from around the house or purchase a cheap feeder that sits on the coop floor. Either way, these kinds of feeders spill 1/3 to 1/2 of the food and spoil it in the dirty litter. This was true both of my small flock of layers and the large flock of meaties.
Instead, you should have a hanging feeder that requires the chicks to stand up and stretch their necks just a little to reach the food. The swinging feeder makes it harder for them to fling food out or toss dirty litter in. My father-in-law very patiently told me how to make such a feeder and showed me how successful it is in his own chicken coop. I purchased this feeder for $15 (after coupon) and will hang it this weekend. It has dividers that prevent food from being dragged out.
Heat lamp: The heat lamps come with a clamp but you aren't really supposed to use it. Instead, hang the lamp from an adjustable chain or rope so that it can be easily raised and lowered each day to keep the brooder at the right temperature. Because we had a lamp clamped to the top, we could never get the heat source close enough to the chicks and the temp in the brooder was around 85°F during the last week of winter.
The brooder temperature should stay at approximately 95°F the first week, then reduce the temperature by raising the bulb farther from the chicks by about 5°F each week until the brooder temperature is the same as the temperature outdoors. Depending on the time of year, it can take as little as three weeks to acclimate your chicks to living in outdoor temperatures. There are several good temperature charts on the web.
April 3, 2015: Two Weeks Old
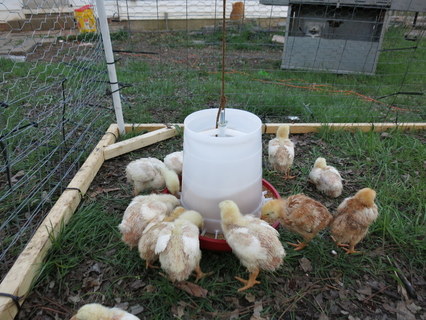
We were not supposed to keep all 24 chicks but when the other interested parties failed to pick up the birds, we had to find a place to keep them all. Next time I'll plan to have a large brooder ready for a batch this size.
They grew quickly so we had to build something larger right away. We attempted to combine a brooder with a free range pen because the chicks will only need a heat lamp and bed for another couple of weeks. I used supplies from around the garage which means the hoop coop is ugly, but didn't cost anything extra.
The chicks had a fun afternoon chasing bugs and worms. They learned to use their new feeder, which is designed to reduce or eliminate spilled and wasted feed. So far, there is no spilled feed on the ground. Hurray!
For now we included a hanging bulb with their old bin of clean pin shavings underneath it. Between cutting the wood and fencing then hanging their new water, food and heat paraphernalia, we spent about eight hours on the project.
April 7, 2015: Three Weeks Old
I did some research to see how much feed I might be buying over the next few weeks and found a good estimate on the Backyard Chickens forum. The hatchery provides a chart, but the feed estimates were little low for our experience because I could not find a very high protein feed during the first month. Depending on the protein content of the feed you buy, a Cornish X should eat about 13 pounds of feed in its short life. A bag of feed is around $15 for 50 pounds, or $0.30 per pound. Here is my estimate of the cost for 25 birds.
First 2 weeks they will eat about Half of a pound per week each, 20% protein chick starter is best
25 x 0.5 lb = 13 lb per week x 2 weeks = 36 lb. total first two weeks = $11 total
March 18-April 1
Next 4 weeks they eat 1 pound per week each, 18% protein is best to keep building muscle
25 x 1 = 25 lb per week x 4 weeks = 100 lb over four weeks= $30 total
April 2 - April 30
Final 2 weeks it is 3 pounds per week each, 15% protein to put fat on the chickens
25 x 3 = 75 pounds per week x 2 weeks= 150 lb over two weeks= $45 total
May 1-May 9
Spilled/ wasted feed approximately due to silly chickens and my learning curve 30 lb.= $10
Plan to Process on May 9 and 16 at about 8 weeks of age, if weather permits.
TOTAL feed for 25 birds= 320 lb.
TOTAL Cost of feed: $100, divided by 25 birds = $4 per bird over 8 weeks
This correlates with the hatchery's estimate of the birds eating 13 pounds of feed over an 8 week life span. If we take some birds in to week 9, that will be an extra $20 in feed, or about $1 per bird.
Another farmer posted a wonderful experience with raising Cornish X chickens.
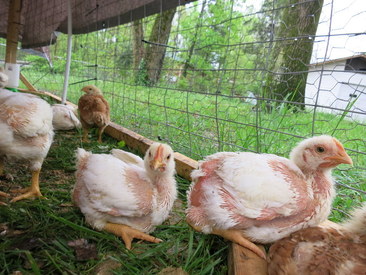
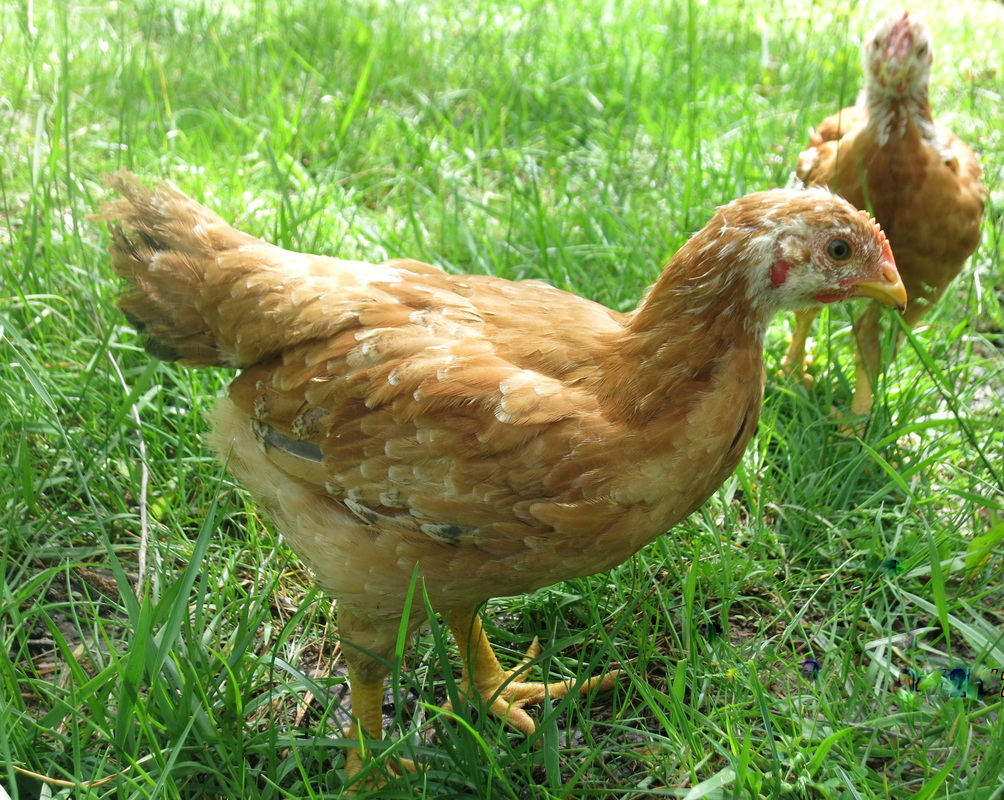
 Four-week-old Red Ranger
April 14, 2015: Four Weeks Old
The four week old birds are happily settled outside. We feed and water them each morning and let them free range in the afternoons. On chilly days, they stay in the hoop coop near the heat lamp. Our meat birds were crowded in their indoors brooder so we moved them to an outdoor coop at three weeks of age. The weather has been damp (verging on flood stage!) so even though temps are often in the 50s or 60s, I keep the heat lamp on them almost all of the time. Half of the chicks are under the lamp and half are around the coop, all perfectly at their ease. When the sun bothers to make an appearance, I turn the lamp off so the chicks will find a dry spot of grass and bask in the sun.
I personally feel that mid March was too early to buy meat birds. Next year, I'd like to purchase 50 chicks in mid April, they can move outside in mid May when it is warm then process them in June before the heat sets in to bother them. We can buy 50 more in mid September, keeping them comfortable indoors until October cools us down and process them in November. That gives us plenty to eat, share with family and sell to friends.
 Four-week-old Cornish Cross
Cost to date:
Vaccinated Straight Run Meat Birds: 24 @ $2.38 = $57
Chick Starter: 150 lb. = $46
Red Light bulb = $12
Hanging feeder= $15
------------------------------------
TOTAL Cost Per Bird= $5.42 on Day 28
Vaccinated Straight Run Meat Birds: 24 @ $2.38 = $57
Chick Starter: 150 lb. = $46
Red Light bulb = $12
Hanging feeder= $15
------------------------------------
TOTAL Cost Per Bird= $5.42 on Day 28
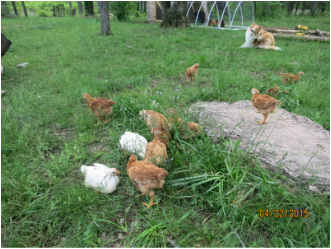
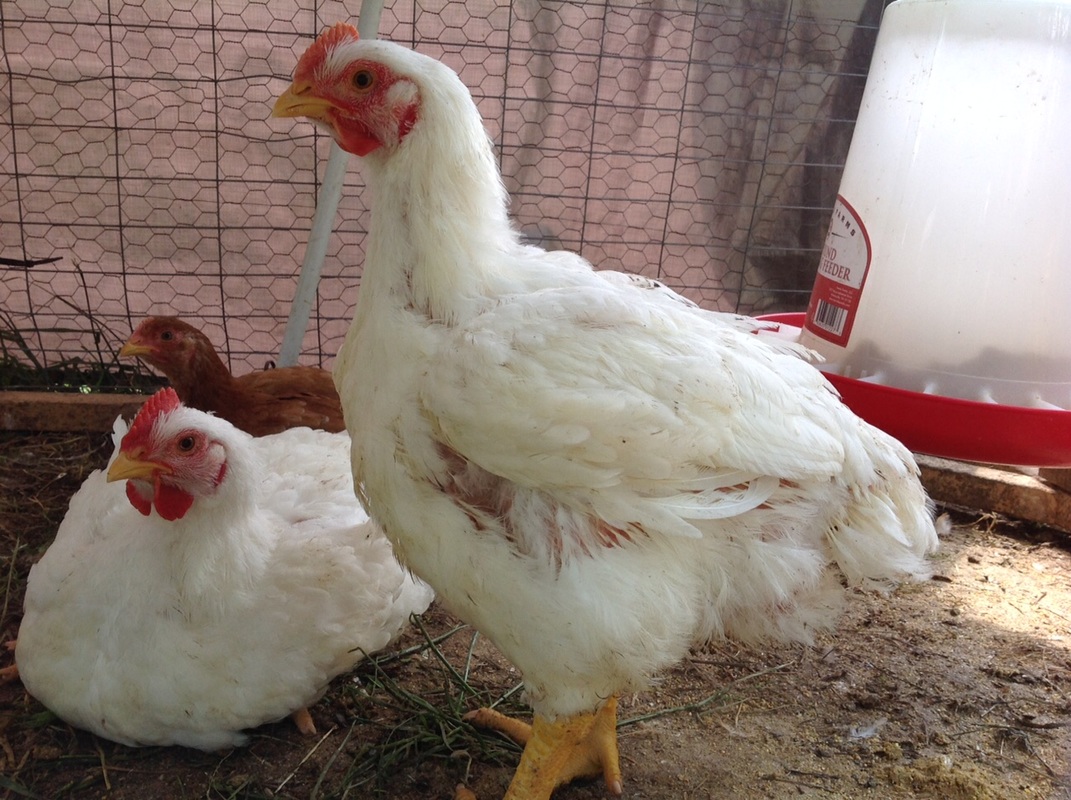
April 23, 2015: Five Weeks Old
I turn the heat lamp off every morning and on at night. Chicks are growing rapidly! The largest ones can hardly walk. They waddle, waddle, sit, everywhere they go. If you notice in this picture, the Cornish Crosses are sitting down and all of the Red Rangers are walking around. Also notice the beautiful collie in the background who has never hurt a bird!
Someone purchased five of our Cornish Crosses this week for $6 each. Now we are down to 18 birds-- 10 Rangers and 8 Crosses.
Strangest thing happened today-- when all of the birds headed back to their heat lamp last night, the largest one lagged behind. I shooed it back to the coop and when I checked on the birds this morning, he was dead. I checked for signs of coccidiosis and Marecks, which are the most common problems with chicks. All of the other birds looked fine so I wonder if he died because he ate too much too soon.
I have not been restricting their feed like I should because I still (STILL!!) have not built a second hoop coop to house the Red Rangers and they are just ravenous if they have to miss 10 hours of food. Unfortunately, I think it cost me an otherwise healthy bird.
There were two other birds about the same size as that guy, so we decided to go ahead and slaughter them this weekend both as practice and to prevent the same problem from occurring again.
April 25, 2015: Preparing for Butcher Day
Now that I have learned all I can from the Internet, I'm going to plan out what I need to purchase and then do to butcher chickens. This is not going to be easy for me and having a plan always helps me overcome unpleasant situations.
Step 1: Selecting a Location
There is a spot on the far side of the garage that has access to power and is not visible from the house.
Step 2: Doing the Deed
The method that the Self Sufficient Home Acre used makes sense to me from this side of the experience. You cut a hole in the corner of a strong feed bag and place the chicken into the bag, head out through the hole. I might experiment with turning this bag into a hanging cone for draining. In that case, I'll need a post with hooks for hanging two chickens at once. You hold the bird in the bag on the chopping block and lop its head off with one swing. Good luck! Then hang the bag to let the blood drain into buckets.
Step 3: Defeathering Our Friend
First the bird must be scalded using a wood fire, one or two large pots of water and agrate to set the pots on and a thermometer to make sure the water is hot enough to do the job of loosening feathers. Then the chicken can go into the motorized chicken plucker.
Step 4: The Icky Part
Why do they call it "dressing" the animal if you are removing all of the parts that make it an animal? Weird. Anyway, I'll need a worktable with a stand for the iPad because I'm pretty sure I can't do this part without guidance. Poultry shears, pinning knife, lung scraper and boning knife seem to be the standard tools for this set up.
Finish plucking the chicken with hands and pinning knife. Place chicken on cutting board and begin by removing feet, wing tips, tail and head with sheers. Then use knife and fingers (oh, I don't want to forget gloves!) to complete the process. All of the entrails will go into a garbage can with liner.
Step 5: Storing the Meat
Place chicken immediately into an ice water bucket. Later, place birds in shrink bagsand let sit in the fridge for a couple of days. Then use hot water to shrink the bags tight.
Step 6: Clean Up
I am concerned about attracting predators to my yard, so I plan to bag the entrails and toss them in a dumpster.
Materials List (Items in bold need to be purchased)
two feed bags, check
post with two hooks, check
two small buckets, check
two large pots, look at thrift stores
$10 thermometer, check
$16 chicken plucker building plans
$20 chicken plucker building materials
worktable covered by plastic, check
stand for iPad, check
$25 poultry sheers, Amazon.com
pinning knife (maybe next time around)
lung scraper (wow, these are really expensive! Next time around)
$10 boning knife, Amazon.com
cutting board, check
gloves, check
garbage can with liner, check
bucket for ice water, check
$15 shrink bags for finished product
|
April 29, 2015: Six Weeks Old, Processing Day #1
It really surprised us when our largest bird died recently. I'm guessing it ate too much food. I'm carefully restricting everyone now, but we also decided to go ahead and do a test run on the two other large birds, just in case they are having similar health trouble. I haven't had time to order special tools, so we are just winging it. Pun not intended. First, John picked out the biggest chicken, flipped it upside down, carried it to the chopping block, and laid it down, on its back. He stretched out its neck so gently that the chicken just staid in place. |
|
Then he raised the ax and decapitated the chicken in one chop. Most farmers seem to prefer to slit the chicken's throat in a "cone of death," taking up to 30 seconds for the chicken to lose consciousness. In my limited experience, the chopping block only allows the chicken to suffer for a few seconds if at all.
The chicken was placed upside down in a cut-off milk jug like this one, to let the blood drain for a few minutes. Next, we heated a large pot of water on a propane stove to about 120 degrees and dunked the chicken for several seconds. The Cornish Crosses do not have many feathers at this age, so it took a very short time to have the chicken cleanly plucked.
The chicken was placed upside down in a cut-off milk jug like this one, to let the blood drain for a few minutes. Next, we heated a large pot of water on a propane stove to about 120 degrees and dunked the chicken for several seconds. The Cornish Crosses do not have many feathers at this age, so it took a very short time to have the chicken cleanly plucked.
|
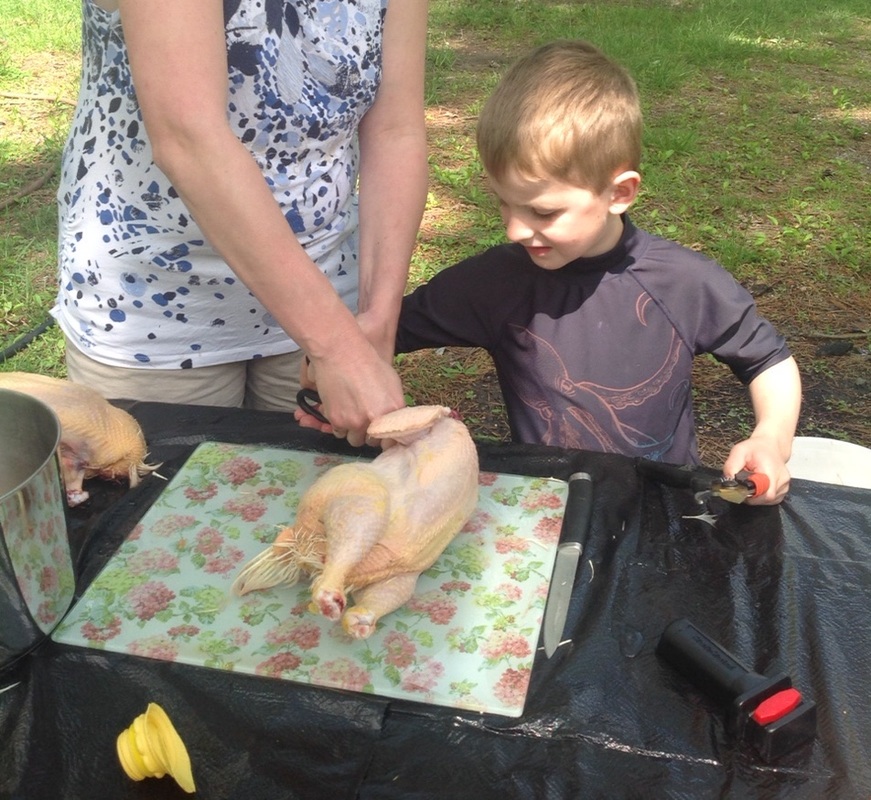
My sister was so kind as to hold the iPad while I watched the YouTube video about poultry processing. It wasn't tricky. No blood to speak off. No special tools. We used regular kitchen shears and a sharp kitchen knife.
Emotional difficulty is a different story. I cut off a chicken's head and then cleaned out its insides so my family could eat it for dinner. I balked a couple of times while the bird still had feathers but pushed through. After a point, it wasn't a lot different from preparing a grocery store chicken for dinner. You have to remove the innards, wash the chicken, season and pop it in the oven. |
Two of my kids were curious about the process. The head chopping part was hard for them to understand, but they helped with the cleaning just like they help with preparing store bought chicken for dinner. My 10 year old was very interested in the innards. He could identify lots of the parts on his own and I pointed out some parts unique to birds.
My middle son was not happy about this AT ALL. He loves birds of all kinds and has been appalled for weeks that we would consider killing these birdies. He and his friend have come up with all kinds of reasons we shouldn't do it or ways around it. We showed him the dressed bird so he could see it looks like our usual chicken dinners, but he hasn't warmed up to the idea yet. I can't blame him. He has made the connection to the struggle and the reward.
The largest chickens two were three pounds, dressed. The smaller one was 2lb. 12 oz. My sister took one to share with mom and dad as a thank you for her moral support (and holding the iPad!) The birds are supposed to rest in the refrigerator for a couple of days (no sure why?) so we'll do a taste test son.
Cost to date:
Vaccinated Straight Run Meat Birds: 18 = $27
Chick Starter: 200 lb. = $62
Red Light bulb = $12
New spill-proof feeder= $15
------------------------------------
TOTAL Cost Per Bird= $6.44 on Day 40
April 30, 2015: Seven weeks old
Good gosh, I'm addicted! Tractor Supply had Cornish Rock (another name for Cornish Crosses) chicks on sale for $1 each and I impulse bought ten. I had to hide them from my husband for his own good-- the 20 we have now cause him no little stress. The new guys are in the outside garage, with a heat lamp.
We had previously purchased 25 chicks and removed their heat lamp at five weeks when temps were in the 60s/70s. It has gotten a little cooler so ran outside to put a low wattage heat lamp out there for them.
These will be a little less expensive to eat because they were cheaper to start with, there are only 10 so they aren't going to trample each other to death, and we already have a very nice set up with all of the necessary equipment.
|
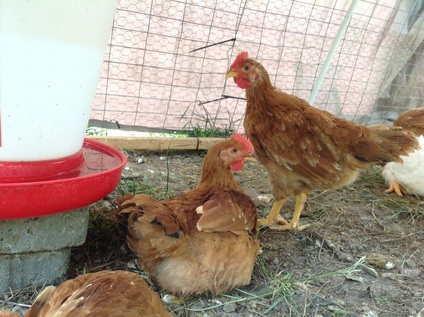
May 4, 2015
The birds have really grown, the roosters have more pronounced combs and are trying to crow. We have four Crosses left, and I have had to raise the feeder to a foot off the ground, because these birds just want to sit on their behinds and eat. Now they stand up, grab some food, sit down and rest, up and down, up and down. The Rangers are a much livelier group, though obviously much smaller. The Crosses are also greedy. There are only four, but they will do what they can to nudge the Rangers away from the feeder. |
|
When I open the coop door in the afternoons, the Rangers run out of the door and into the yard. I have to physically remove the coop, leaving the Crosses exposed before they will stand up and move to cover under a bush or tall grass. I'm not complaining, just noticing how different they are from "real" chickens.
The three birds we butchered last week cost around $6.50 from purchase to table. I reduced the amount of the supplies and feed in my calculation to cover their part. The remaining birds are eating a lot more food and up to $7.50, including initial purchase, feed and supplies. They will probably go up $1 in cost per bird each week they stay alive.
Cost to date:
Vaccinated Straight Run Meat Birds: 14 = $21
Chick Starter: 250 lb. = $66
Supplies: $11
TOTAL Cost Per Bird= $7.00 on day 55
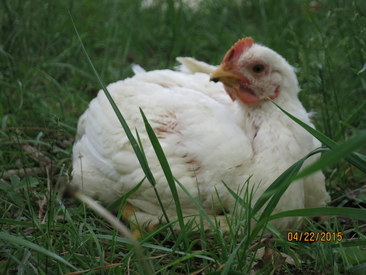
May 7, 2015: Eight Weeks Old
|
The birds are switching to a finishing feed today. It has lower protein (the stuff that builds muscle) in order to encourage the flavorful fat to grow for the next week or two.
|
